Multiplayer Platformer Log #4 – Testing Environment
Motivation
I am developing this game on Windows 10, but eventually the game server will be running on Linux (for obvious reasons).
Testing builds and functionality locally is good enough, but testing things like client-side prediction, we won’t be able to properly check the behavior without some simulated latency and packet drops.
We could probably use something like clumsy on Windows for that, but personally I would still like to test on the target OS.
Our Options
To test how the game would actually behave in the real world we have three options. The first that comes to mind – we could spin up a real server and test the game there. This has the advantage of being essentially as realistic as we can get (not including stress testing).
But it does have a couple of disadvantages:
- Higher cost. Although prices of small VPS are mostly negligible, we still have to take out our wallet.
- More difficult to setup. We will have to do it eventually, but when just starting up, we probably want everything to be as simple as possible.
- Less control. When testing, optimally we want to have absolute control over the environment. With actual server we can’t really control latency and packet drops. Even worse if your workplace doesn’t really have a good Internet connection.
- Security concerns. We probably don’t want to spend time securing our server (and studying how to) this early in development.
Alternatively we could install Linux on some spare old PC laying around and connect to it locally. This would work pretty well, if we actually have the spare computer and our work environment allows it.
Even simpler solution is to install a virtual machine right here on our development computer. We can save snapshots, boot/shutdown/restart fast, all from the comfort of our keyboard. And without the stress of dealing with an actual server somewhere far away.
These latter options provide a great practice run for actually working with Linux. With virtual machine we also get a quick recovery in case we mess something up (just reload from a snapshot).
Setting Up Linux Virtual Machine
Disclaimer: I’m not a Linux guru, I’m a Linux noob. The process here worked for me and it will probably work for you, but I’m not in any way saying that this is the best approach. If someone more skilled finds some errors or has some hints for me, please do share. I’m always eager to learn.
First step is to install a virtual machine software or hypervisor, as they are apparently called. I picked VirtualBox because it’s free and the Internet recommends it.
Download the Windows host, optionally (but highly recommended) check the checksum and install it. Nice simple UI should welcome us and we can click New to add a new virtual machine.
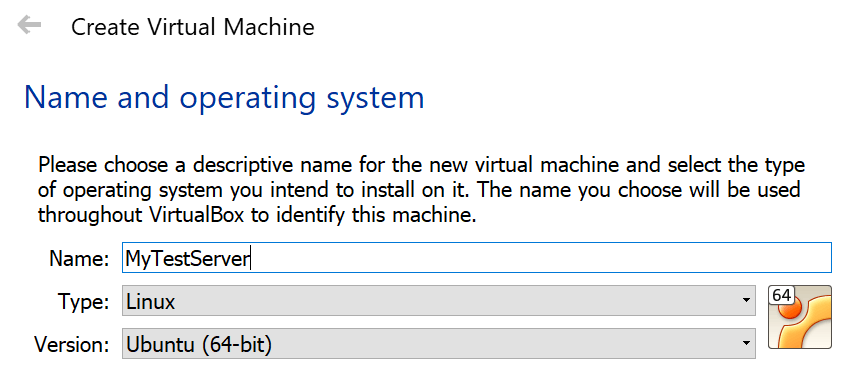
- Name and operating system: Fill in any name you like. Choose Linux and select the distribution you plan on using. I selected Ubuntu, because it’s supposedly better for beginners. In the end it probably doesn’t matter much.
- Memory size: I set the RAM to 512MB as that’s what I plan on using in production.
- Hard disk: The default, virtual hard disk, should suit us just fine.
- Hard disk file type: I don’t foresee a need for attaching the drive to a different virtualization software, so let’s keep it at VDI.
- Storage on virtual hard drive: Dynamically allocated is fine, it won’t waste our possibly precious disk space.
- File location and size: Whatever suits your needs, I left the defaults.
Great, now we have our virtual machine set up. But if we click Start, it won’t boot up a Linux for us. First we need to install it. Let’s download an Ubuntu Server. I downloaded the Ubuntu 16.04.2 Server (64-bit) using torrent.
We can select our new virtual machine and start it up. VirtualBox is smart enough to ask us to supply start-up disk the first time we click Start. Supply the Ubuntu Server .iso file you downloaded and confirm.
Alternatively, if we canceled the first startup, VirtualBox will simply start the virtual machine which will tell us FATAL: No bootable medium found! System halted. If that’s the case, simply navigate to Devices -> Optical Drive -> Choose disk image from the toolbar menu of the virtual machine window.
Then do Machine -> Reset and the installation process should start.
Installation process itself is pretty simple, letting everything stay at defaults we can mostly keep pressing enter. If everything went alright, we should be welcomed by a login prompt:
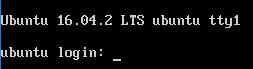
Optionally install updates using sudo apt-get upgrade (I don’t think they are very important for our virtual machine though). We can save a snapshot of the clean Linux in the VirtualBox, so we have a recovery point if needed.
Installing Node.js:
# download the install script
$ curl -sL https://deb.nodesource.com/setup_6.x -o nodesource_setup.sh
# execute it
$ sudo bash nodesource_setup.sh
# finally install node
$ sudo apt-get install nodejs
# test that it works
$ nodejs -v
The last command should print us something like v6.11.0 confirming that Node.js is installed on the system.
Shared Folders
Next we need to get our server files to the virtual machine. Simplest way for me was to use VirtualBox’s Shared Folders. For those to work, we need to install Guest Additions first though.
With the virtual machine running, select Devices -> Insert Guest Additions CD image from the toolbar. That will do exactly what it says. Next we need to mount it so we can access the files on it.
$ sudo mount /dev/cdrom /media/cdrom
# install the Guest Additions
$ sudo /media/cdrom/VBoxLinuxAdditions.run
Depending on how you installed your Linux, you might need to install linux-headers first. Some tutorials also mention dkms and build-essential, although the official VirtualBox manual doesn’t. In case the Guest Additions failed to install, try this command to install the missing requirements:
$ sudo apt-get install -y dkms build-essential linux-headers-generic linux-headers-$(uname -r)
Now we can shutdown now. In the VirtualBox, select Settings for our machine. Navigate to Shared Folders tab and add a new one. Set the shared folder path to the folder you want shared, make sure to check Auto-mount and Make Permanent, and confirm. Result should look something like this:
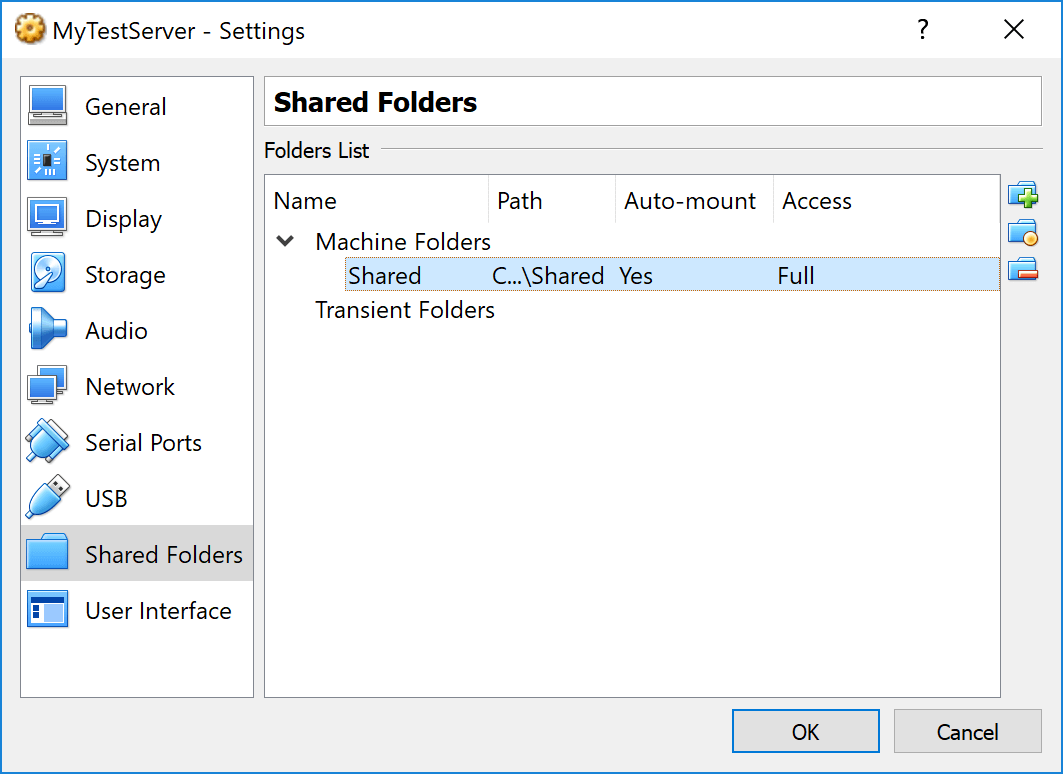
Start up the machine again and the shared folder should be automatically mounted at /media/sf_<SharedFolderName>. We can put our server files there and if our shared folder is called “Shared” then executing sudo ls /media/sf_Shared should print out the files’ names.
Depending on your server requirements, you can start the server directly from this shared folder, or only use this folder as exchange place and move the files elsewhere. I recommend the latter option especially if your Node.js application uses native modules. You wouldn’t want to share those between Windows and a Linux machine.
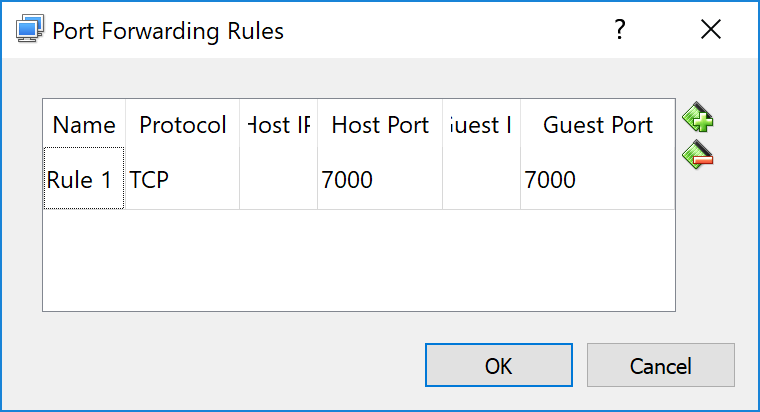
Forwarding Ports
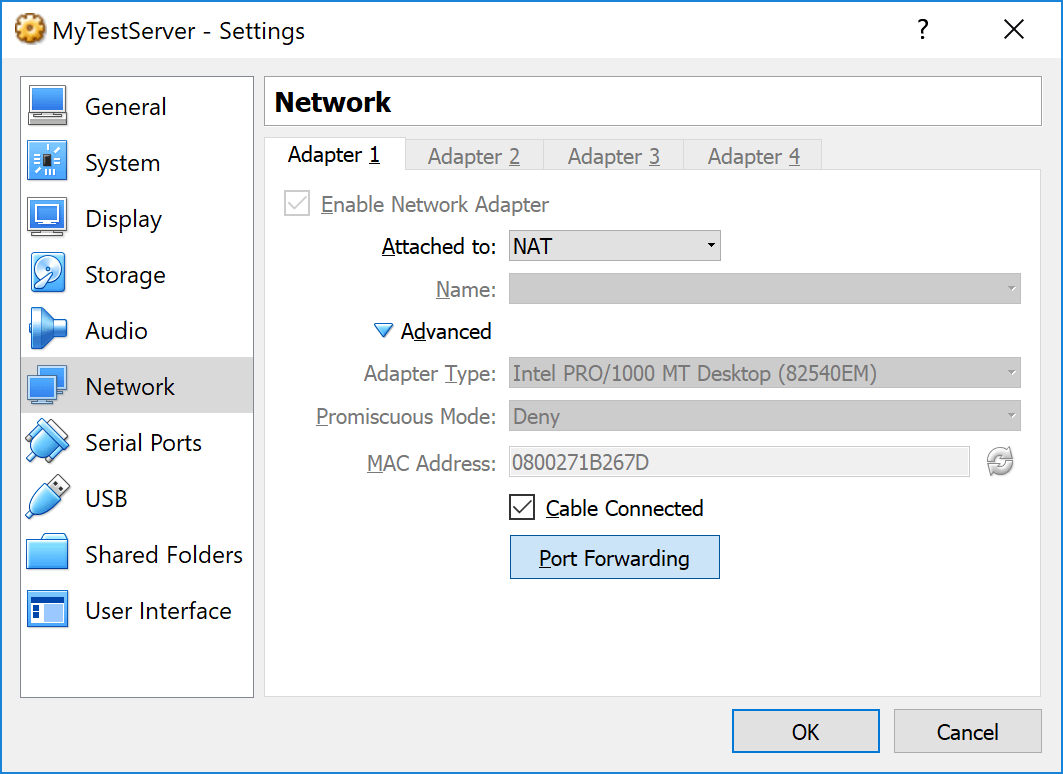
We will want to connect to our server. VirtualBox handles this nicely for us. Instead of messing with virtual networks, bridges or whatever, we can simply instruct VirtualBox to forward the ports we need to our host. Meaning we can connect to our game as if the server was running on the Windows, not the virtual machine.
Go to Settings for our virtual machine. Navigate to Network, open the Advanced section and press the Port Forwarding button. Add the rule(s) you need and confirm. The machine will have to be restarted for this to take effect.
Simulating Latency And Packet Drops
Here comes the fun part. Let’s create a new file in the shared folder called apply-latency.sh with the following content:
#!/bin/bash
echo Adding 200 ms latency and 15% packet loss.
tc qdisc add dev enp0s3 root netem delay 200ms 20ms 25% loss 15% 25%
Essentially this adds 200 ms latency with ± 20 ms variation. The third parameter adds 25% dependency of the next variation based on the previous one. And we are also applying 15% packet loss with 25% dependency. See netem wiki for deeper explanation of how this works.
You may want to tweak these settings based on what you are testing. 200 ms latency can be found in the real world, but packet loss is usually at worst around 1%, usually much lower.
These settings will not survive reboot, so we have to apply them on each startup. I also keep a remove-latency.sh file that removes the settings so I don’t have to reboot all the time:
#!/bin/bash
tc qdisc delete dev enp0s3 root netem
echo Removed rules. Current rules:
tc qdisc show dev enp0s3
Now to actually apply/remove the delay and the packet loss, simply run the desired script:
$ sudo /media/sf_Shared/apply-latency.sh
And that’s basically how I tested and captured videos for the third developer log Authoritative Server.
EDIT:
I was informed by zeebo from the helpful html5gamedevs community that netem only shapes the behavior of outgoing packets.
That means that while packets from the server to the client will take long and be dropped artificially, the packets from the client to the server will still come fast. There is a way to deal with it using netem, but it is probably a lot easier to just use clumsy on the Windows side.